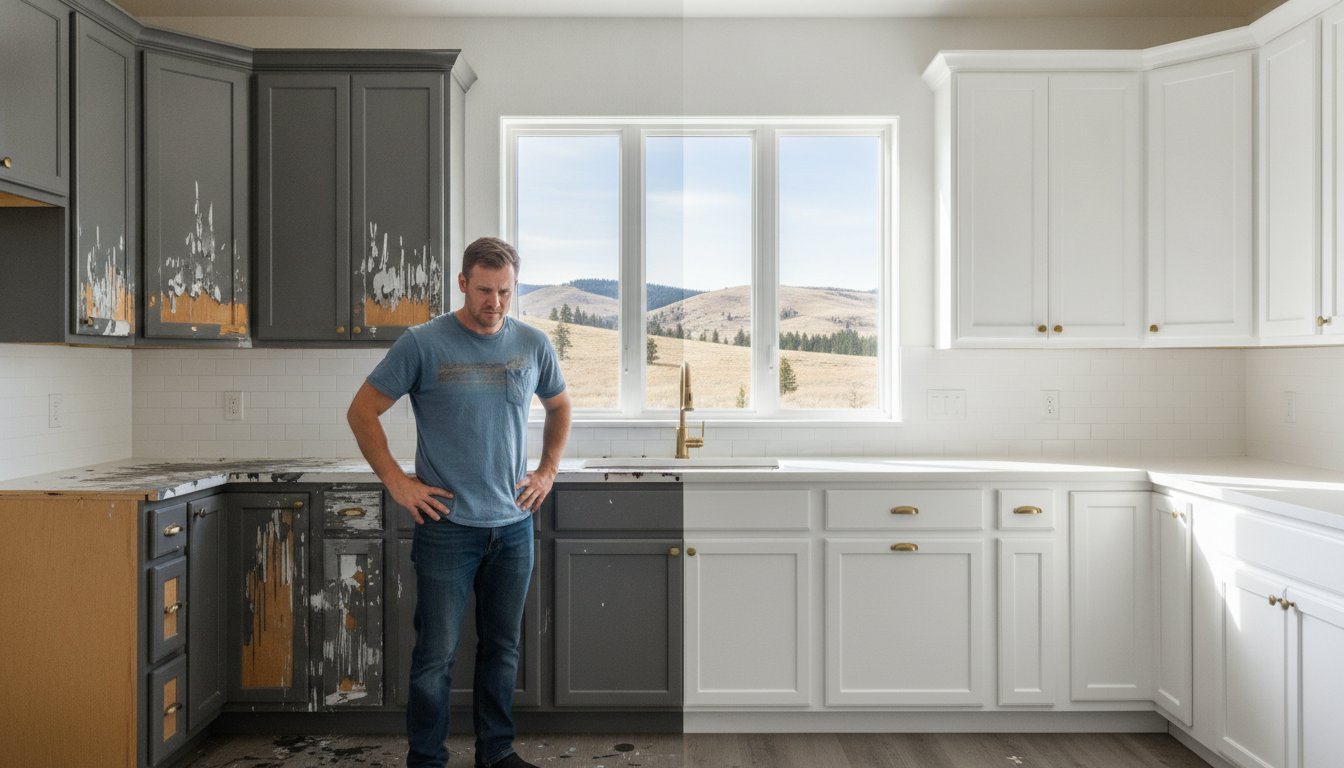
Your kitchen transformation isn't actually about the color you choose; it's about the chemistry of the bond between the wood and the coating. With painted cabinets holding a 52% market share in 2026, many homeowners feel the pressure to update their space, yet they often underestimate the 20 to 40 hours of meticulous labor required for a professional result. Identifying the specific mistakes to avoid when painting kitchen cabinets is the difference between a stunning, revitalized environment and a costly, peeling mess that ruins your expensive cabinetry.
We understand that the process feels overwhelming, especially when you're navigating complex VOC regulations and choosing between modern waterborne alkyd or urethane enamels. You deserve a kitchen that reflects your pride in your home without the stress of amateur errors. This guide provides the technical expertise you need to master cabinet refinishing. We'll preview the essential prep work, explain the reality of 30-day cure times, and give you a clear roadmap to a smooth, factory-quality finish that stands the test of time.
Key Takeaways
- Master the essential degreasing techniques that ensure your new finish bonds permanently to high-traffic, grease-prone surfaces.
- Identify the critical mistakes to avoid when painting kitchen cabinets, such as substituting specialized cabinet enamels with standard wall paint.
- Implement a professional labeling system for all doors and hardware to eliminate the stress of a complicated reassembly process.
- Avoid common application blunders like thick coats and airborne dust to achieve a flawlessly smooth, factory-like texture.
- Recognize when a complex kitchen layout requires professional-grade spray equipment to guarantee long-term durability and a seamless result.
Why Kitchen Cabinet Painting Fails: The "Invisible" Mistakes
Kitchen cabinet painting is a sophisticated technical restoration, not a simple cosmetic update. While wall painting involves applying color to a stationary, porous surface like drywall, cabinet refinishing requires a finish that can withstand heat, humidity, and constant physical contact. One of the most critical mistakes to avoid when painting kitchen cabinets is treating them like a standard interior wall. Cabinets are mechanical tools that require specialized coatings designed for both extreme hardness and subtle flexibility.
The kitchen environment is inherently hostile to paint. Every time you cook, microscopic layers of grease and steam settle on your surfaces. If these contaminants aren't removed through industrial-grade cleaning, your new finish will fail within months. Understanding the types of cabinet materials and finishes you're working with is the first step in ensuring long-term success. Solid wood, laminate, and MDF all require different chemical approaches to ensure the paint doesn't just sit on top but actually integrates with the surface. Relying on "all-in-one" products often leads to disappointment because these formulas usually compromise on the bonding strength required for non-porous cabinetry.
The Myth of the "No-Prep" Paint
Marketing campaigns often promise "no-sand" or "all-in-one" solutions to appeal to busy homeowners. These products rarely provide the durability needed for a high-traffic kitchen. Mechanical bonding, achieved through light sanding, creates a "profile" for the paint to grab onto. Chemical bonding, achieved through high-adhesion primers, ensures the paint stays put. Adhesion is the chemical and physical attraction between the coating and the substrate that prevents the paint from sliding off over a layer of microscopic grease.
Underestimating the Project Timeline
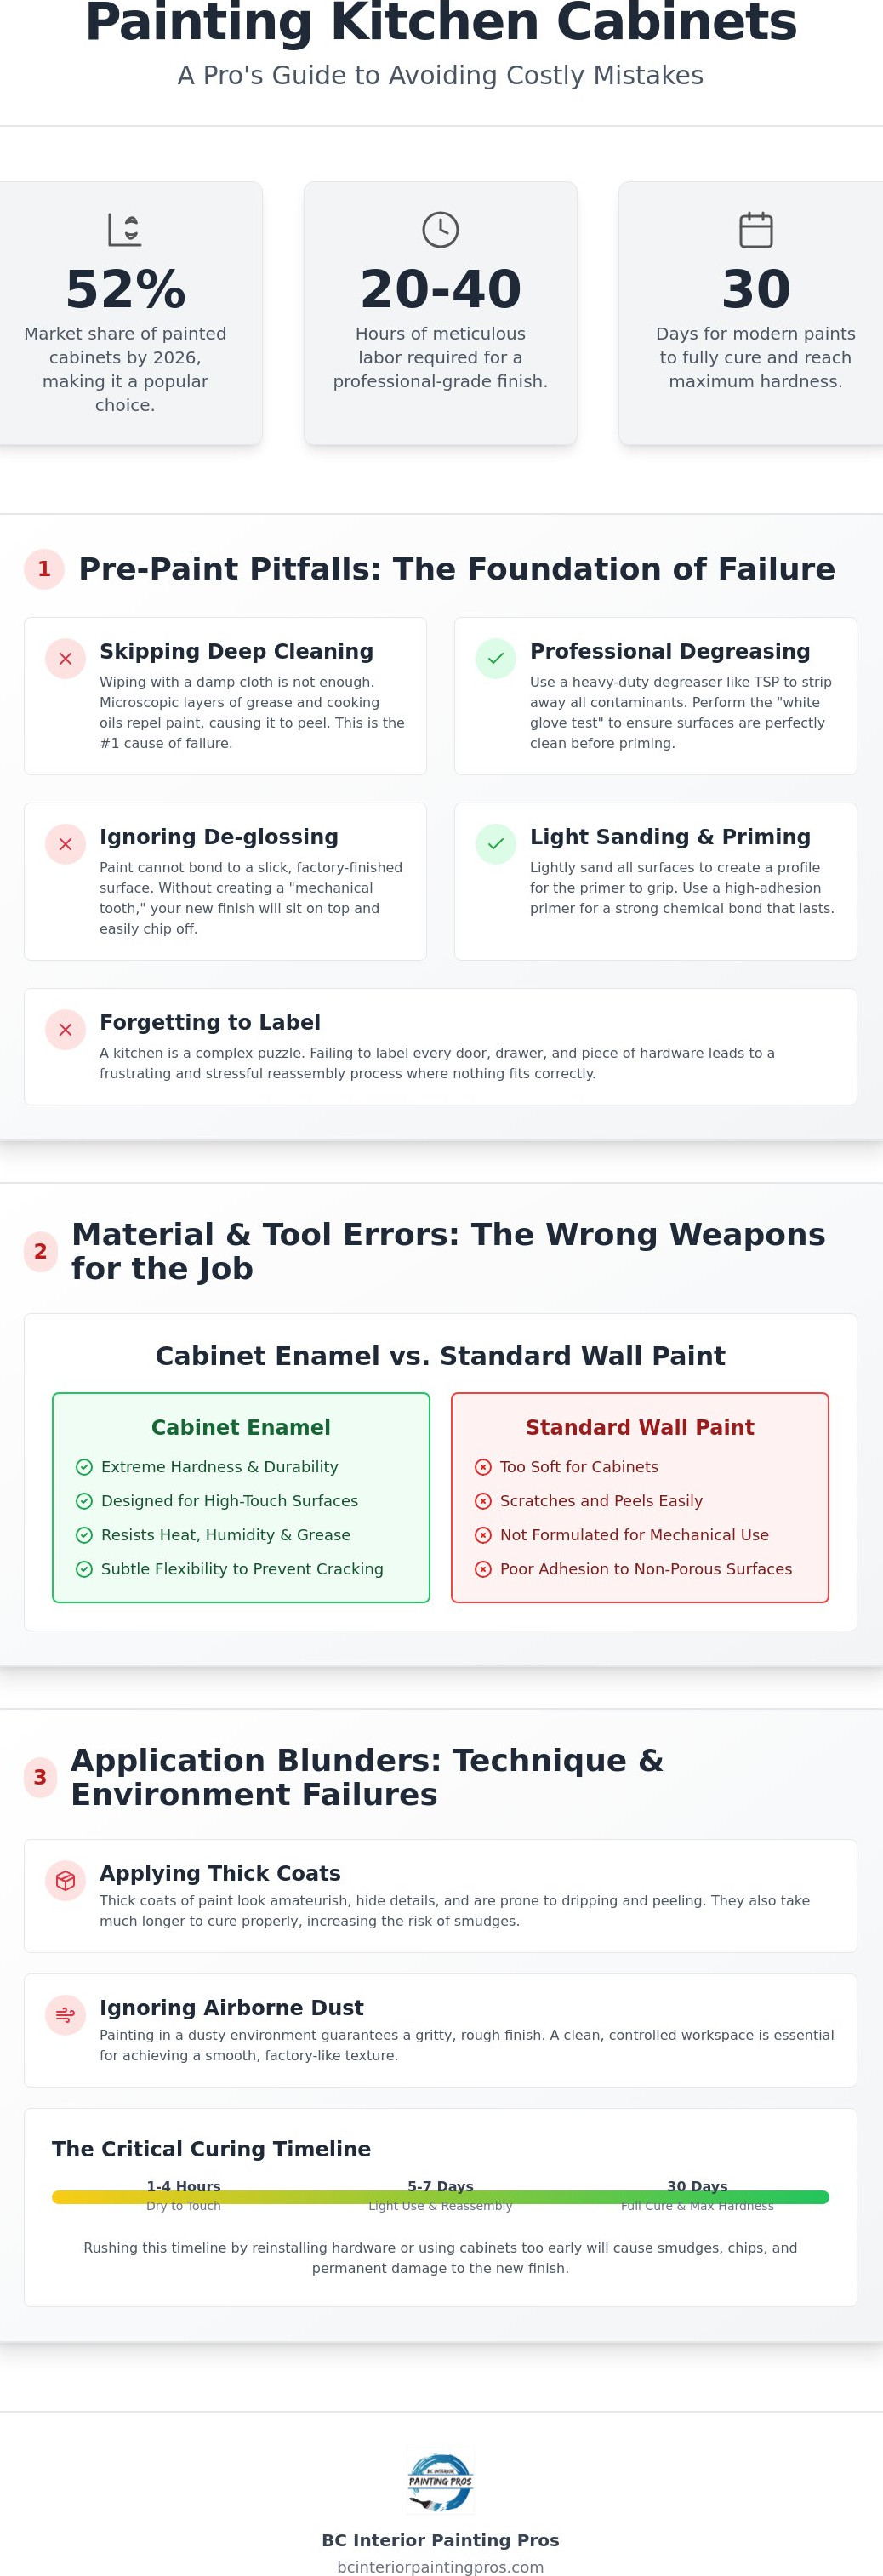
A professional-grade transformation typically requires five to seven days of dedicated labor. Rushing this timeline is one of the biggest mistakes to avoid when painting kitchen cabinets. While modern paints might feel dry to the touch in hours, they often require a full 30 days to reach maximum hardness. Reinstalling hardware too early can cause the paint to smudge or peel immediately. DIY enthusiasts often experience significant emotional fatigue when their kitchen remains a construction zone for longer than expected. Planning for a realistic schedule ensures you don't cut corners when the process starts to feel tedious.
Pre-Paint Pitfalls: Skipping the Foundation of the Finish
The most common mistakes to avoid when painting kitchen cabinets often occur before a single drop of paint touches the surface. Preparation isn't just a preliminary step; it is the most critical phase of the entire project. Many homeowners treat cabinets like walls, failing to realize that kitchen surfaces are coated in a microscopic layer of cooking oils, steam residue, and household dust. If you skip the rigorous cleaning and de-glossing stages, your high-end paint will eventually peel away in large sheets.
Painting over hinges and hardware is another frequent error that screams amateur results. It's tempting to leave the doors hanging to save time, but paint buildup in the hinge mechanism causes binding and eventually chips the finish. Removing every piece of hardware is non-negotiable for a professional look. If the task of dismantling your entire kitchen feels too daunting, you might consider reaching out to a local painting expert who can handle the technical logistics for you.
Deep Cleaning vs. Surface Wiping
Wiping your cabinets with a damp cloth is insufficient. Professional painters use Trisodium Phosphate (TSP) or a similar heavy-duty degreaser to strip away polymerized oils. Focus your attention on "grease traps" located near the stove and above the hood fan. These areas accumulate the most residue. To verify your work, perform the "white glove test." Rub a clean, white lint-free cloth over the surface; if any yellow or grey residue appears, the cabinet isn't ready for primer.
For factory-finished or laminate cabinets, cleaning is only half the battle. You must de-gloss the surface to remove the high-sheen protective layer. This process creates a mechanical "tooth" that allows the primer to bite into the material. Without this step, the paint sits on the surface rather than bonding to it.
The Organization Error: Labeling and Hardware
A kitchen with twenty doors and ten drawers is a jigsaw puzzle waiting to happen. Failing to label each component is one of the most frustrating mistakes to avoid when painting kitchen cabinets. Even if doors look identical, their hinges have often settled into specific positions over years of use. If you swap them during reassembly, the screw holes may not align perfectly, leading to crooked doors and uneven gaps.
Use a simple numbering system. Place a small piece of painter's tape with a number inside the hinge cup of the door and a corresponding number inside the cabinet carcass. This level of detail ensures your Cabinet Painting Kamloops: A Smart Kitchen Update remains a success from start to finish. Store all screws and hinges in labeled bags to prevent the inevitable "missing screw" headache on day seven.
Material and Tool Errors: Using the Wrong Products
Selecting the wrong supplies is one of the most expensive mistakes to avoid when painting kitchen cabinets. Many homeowners attempt to use standard latex wall paint, assuming it will suffice for wooden surfaces. This is a critical error. Wall paint is designed to be flexible and breathable, but it lacks the "block resistance" required for cabinetry. Without this property, your cabinet doors will stick to the frames every time they close, eventually pulling the paint right off the wood. Professionals utilize specialized waterborne alkyd or urethane enamels that dry to a hard, furniture-grade finish.
Your choice of sheen also dictates the longevity of the project. While matte finishes are popular for walls, they are nearly impossible to clean in a high-grease environment. Kitchen cabinets require a satin, semi-gloss, or gloss finish to ensure that steam and oils don't penetrate the coating. Using low-quality tools further compounds these issues. A cheap brush or a standard nap roller will leave visible texture, lint, and brush marks that ruin the aesthetic of your kitchen transformation.
The Primer Problem: Not All Primers Are Equal
Success depends on the chemical bond between the primer and the substrate. For non-porous surfaces or factory-finished cabinets, you must use a high-adhesion bonding primer. If you're working with species like oak or cherry, a shellac-based primer is essential to prevent "tannin bleed," which causes yellowish stains to seep through your new paint. Many artisans prefer Benjamin Moore ADVANCE for its superior leveling properties. This waterborne alkyd formula allows the coating to settle smoothly, mimicking the look of a professional spray job even when applied with a brush.
The Tool Gap: Brushes, Rollers, and Sprayers
The application method determines the final texture of your cabinets. Microfiber mini-rollers are far superior to standard foam rollers because they hold more paint and release it without creating tiny air bubbles. If you choose to brush the frames, invest in high-quality synthetic bristles designed specifically for waterborne enamels. These bristles maintain their stiffness and help the paint level properly as it dries. While DIY HVLP sprayers are available, they often lack the pressure needed to atomize thick cabinet paints. Professional airless systems provide the consistent, fine mist required for a truly flawless, factory-like result.
Application Blunders: Technique and Environmental Failures
Perfecting the application phase requires patience and strict environmental control. One of the most frequent mistakes to avoid when painting kitchen cabinets is applying thick coats of paint to save time. This approach is counterproductive. Heavy layers lead to unsightly sags, drips, and a bumpy "orange peel" texture that ruins the sleek aesthetic of your cabinetry. Professional results depend on multiple thin, even applications that allow the coating to level properly as it dries. This method ensures a durable bond and a smooth, factory-like surface that resists chipping.
Kamloops presents unique challenges for drying paint. Our semi-arid climate and significant temperature shifts between afternoon heat and evening cool-downs can shock a fresh coating. If the environment is too hot, the paint dries too quickly and fails to level; if it's too cold, the chemical bond may never fully form. Managing these variables is essential for a high-tier finish. If the technical demands of managing cure times and environmental dust feel too complex, our residential painting specialists can provide the controlled environment and expert execution your kitchen requires.
Cure Time vs. Dry Time
Understanding the difference between dry time and cure time is vital for project longevity. Modern alkyd-hybrid paints might feel dry to the touch within four to six hours, but they often require up to 30 days to reach full chemical hardness. Reinstalling hardware or closing doors too early leads to "blocking," where the paint sticks to the frame and peels away when the door is opened. To avoid this, create a dedicated drying zone in your home that is free from pets, children, and household dust. Keep the area well-ventilated and maintain a consistent temperature to support the curing process.
Sanding Between Coats: The Step Everyone Skips
A light 220-grit sand between every coat is the secret to a professional finish. This process removes "nibs," which are tiny dust particles or air bubbles that settle in the wet paint. Skipping this step results in a gritty texture that becomes more pronounced with every layer. After sanding, you must be thorough in your cleanup. Use a vacuum with a brush attachment followed by a high-quality tack cloth to ensure every microscopic particle is removed. This level of attentiveness ensures the next layer of paint bonds perfectly to a pristine foundation.
Achieving a Factory-Like Finish: When to Call the Professionals
There is a point in every major renovation where the complexity of the task exceeds the capabilities of standard household tools. This is often referred to as the "DIY Wall." Identifying this moment is one of the most important mistakes to avoid when painting kitchen cabinets. While a small, flat-panel vanity might be manageable for a weekend project, a full kitchen with intricate crown molding, deep corner carousels, or detailed raised panels presents a significant technical challenge. A brush or roller simply cannot navigate these crevices without leaving visible build-up or streaks that detract from the final look.
Professional refinishing relies on the use of specialized spray booths and high-pressure airless systems that atomize the paint into a fine mist. This technology creates a perfectly smooth, durable finish that mimics the original factory coating. While a DIY project might look acceptable for a year or two, a professional application is designed to last a decade or longer. At BC Interior Painting Pros, we manage the entire logistical burden, including the containment of dust and the mitigation of fumes, ensuring your home remains a livable space throughout the transformation.
The Cost of a DIY Mistake
Fixing a failed cabinet painting job is significantly more difficult and expensive than starting with a professional team. If the paint begins to peel due to poor adhesion, the entire surface must be chemically stripped or aggressively sanded back to the original wood. This process is labor-intensive and messy. Beyond the immediate cost, professional refinishing adds measurable ROI to a Kamloops home sale. Potential buyers can easily distinguish between a "painted" kitchen and a professionally "refinished" one, which can be a deciding factor in a competitive market.
Our Professional Cabinet Refinishing Process
Our approach is rooted in a recurring commitment to accuracy and attentiveness. We utilize industrial-grade equipment that homeowners typically cannot rent, allowing us to apply specialized coatings that dry to a furniture-grade hardness. Every door and drawer is treated in a controlled environment to ensure no dust particles mar the finish. We take pride in our ability to revitalize your environment with minimal disruption to your daily life. If you are ready to see the impact of expert skill on your space, Get a Free Cabinet Painting Estimate in Kamloops Today and let our team bring your vision to life with professional precision.
Elevate Your Space with a Professional Finish
Achieving a factory-quality finish requires more than just a fresh coat of paint; it demands a deep commitment to technical precision. By identifying the critical mistakes to avoid when painting kitchen cabinets, you protect your investment and ensure a result that stands up to the rigors of daily life. Success hinges on a foundation of heavy-duty degreasing, the selection of high-adhesion primers, and a strict adherence to the 30-day cure time required for modern enamels.
We take pride in our ability to revitalize your environment through a transparent and professional process. With over 20 years of local industry experience, our team provides specialized cabinet spray finishing that delivers a smooth, durable look impossible to replicate with a standard brush. We serve the Kamloops community with a dedication to quality that ensures your kitchen remains the heart of your home for years to come. Revitalize your kitchen with professional cabinet painting from BC Interior Painting Pros. Your vision for a stunning, high-value kitchen is within reach when you pair the right materials with expert skill.
Frequently Asked Questions
Can I paint my kitchen cabinets without sanding them first?
You should not skip sanding if you want a durable finish that lasts. While some products claim to be "no-prep," these rarely provide the mechanical bond needed to withstand kitchen grease and daily use. A light scuff-sand with 220-grit sandpaper creates a texture that allows the primer to bite into the surface. Skipping this step is one of the most common mistakes to avoid when painting kitchen cabinets and often leads to premature peeling.
How long do I need to wait between coats of cabinet paint?
You typically need to wait between 4 and 24 hours depending on the specific product and your home's humidity levels. Modern waterborne alkyd enamels may feel dry to the touch quickly, but they require significant time to off-gas before the next layer is applied. Rushing this window can trap moisture between layers, resulting in a soft finish that never fully hardens. Always check the manufacturer's technical data sheet for precise re-coat windows.
What is the best type of paint for kitchen cabinets in 2026?
The industry standard for 2026 is waterborne alkyd or urethane enamel. These formulas combine the durability and leveling of old-fashioned oil paints with the low VOC levels and easy cleanup of water-based options. High-end products like Benjamin Moore ADVANCE or Sherwin-Williams Emerald Urethane Trim Enamel are specifically engineered for the high-impact nature of cabinetry. They dry to a hard, furniture-grade finish that resists sticking and staining better than standard latex.
Is it cheaper to paint cabinets or replace them entirely?
Painting your cabinets is almost always more affordable than a full replacement. Refinishing allows you to revitalize your environment for a fraction of the cost of new custom cabinetry, which often involves expensive demolition and structural changes. If you decide that a total transformation is necessary, check out Countertops and Cabinetry By Design for expert remodeling and fabrication services. This approach maximizes your return on investment, especially when preparing a home for sale in a competitive market.
How do I prevent my cabinet doors from sticking after painting?
You can prevent sticking by using a paint with high block resistance and allowing for proper cure times. Even when paint feels dry, it remains chemically active and slightly tacky for several days. We recommend using small clear silicone bumpers on the corners of your doors to create a physical gap. This prevents the finished surfaces from touching directly until the coating has reached its maximum hardness, which can take up to 30 days.
Do I really need a primer if my cabinets are already painted?
Yes, a high-quality primer is essential even if your cabinets have an existing finish. Primer acts as a bridge between the old coating and the new paint, ensuring superior adhesion. It also prevents old stains or wood tannins from bleeding through your new color. Using a dedicated bonding primer is a proactive step that eliminates many of the mistakes to avoid when painting kitchen cabinets, providing a stable foundation for the final enamel.
How long does a professional cabinet painting job last?
A professional cabinet refinishing project typically lasts between 8 and 12 years with standard household use. Because professionals use industrial-grade spray equipment and specialized coatings, the finish is significantly more durable than a standard DIY application. The longevity of the job depends on the quality of the initial prep work and the use of high-tier materials. Regular cleaning with non-abrasive solutions will help maintain the factory-like sheen for over a decade.
What should I do if my cabinet paint starts chipping after a few months?
If chipping occurs shortly after completion, it usually indicates an adhesion failure caused by improper cleaning or priming. You must identify if the paint is pulling away from the wood or if the topcoat is separating from the primer. For small areas, you can carefully sand the edges of the chip, re-prime, and dab on a matching topcoat. However, widespread chipping often requires a full professional assessment to determine if the entire surface needs to be stripped.


