What if the most important part of your home's transformation happens before a single drop of paint even touches the wall? You likely understand that a fresh coat of color can revitalize your living space, yet the fear of paint peeling due to poor prep or the anxiety of protecting your expensive flooring can turn a dream project into a source of stress. It's difficult to know which repairs are safe for a DIY approach and which require a specialist's technical expertise, especially with the EPA's strict 2026 lead dust action levels now in effect for many homes.
We're here to provide clarity and peace of mind through a definitive paint job preparation checklist for homeowners. This guide ensures you master the essential steps to prepare your home for a professional-grade interior or exterior transformation that stands the test of time. You'll learn how to safeguard your assets, navigate modern safety regulations like OSHA's fall protection standards, and engineer a surface that guarantees maximum chemical adhesion. We'll walk you through the transition from a cluttered room to a pristine canvas, ensuring your painting day is entirely stress-free and your final finish is nothing short of extraordinary.
Key Takeaways
- Understand why meticulous preparation is the engineering foundation of any professional paint job, ensuring long-term adhesion and preventing costly failures like peeling or bubbling.
- Utilize our comprehensive paint job preparation checklist for homeowners to safeguard your assets and establish efficient staging areas before the project begins.
- Learn technical surface science techniques, including de-glossing and precise patching, to achieve a flawless, high-tier finish on both interior and exterior surfaces.
- Discover how to coordinate seamlessly with a professional crew by establishing clear communication channels and ensuring easy site access for a stress-free experience.
- Master environmental controls to mitigate the impact of local humidity and temperature on your paint's dry time and sheen consistency.
The Foundation: Why Preparation is 90% of a Professional Paint Job
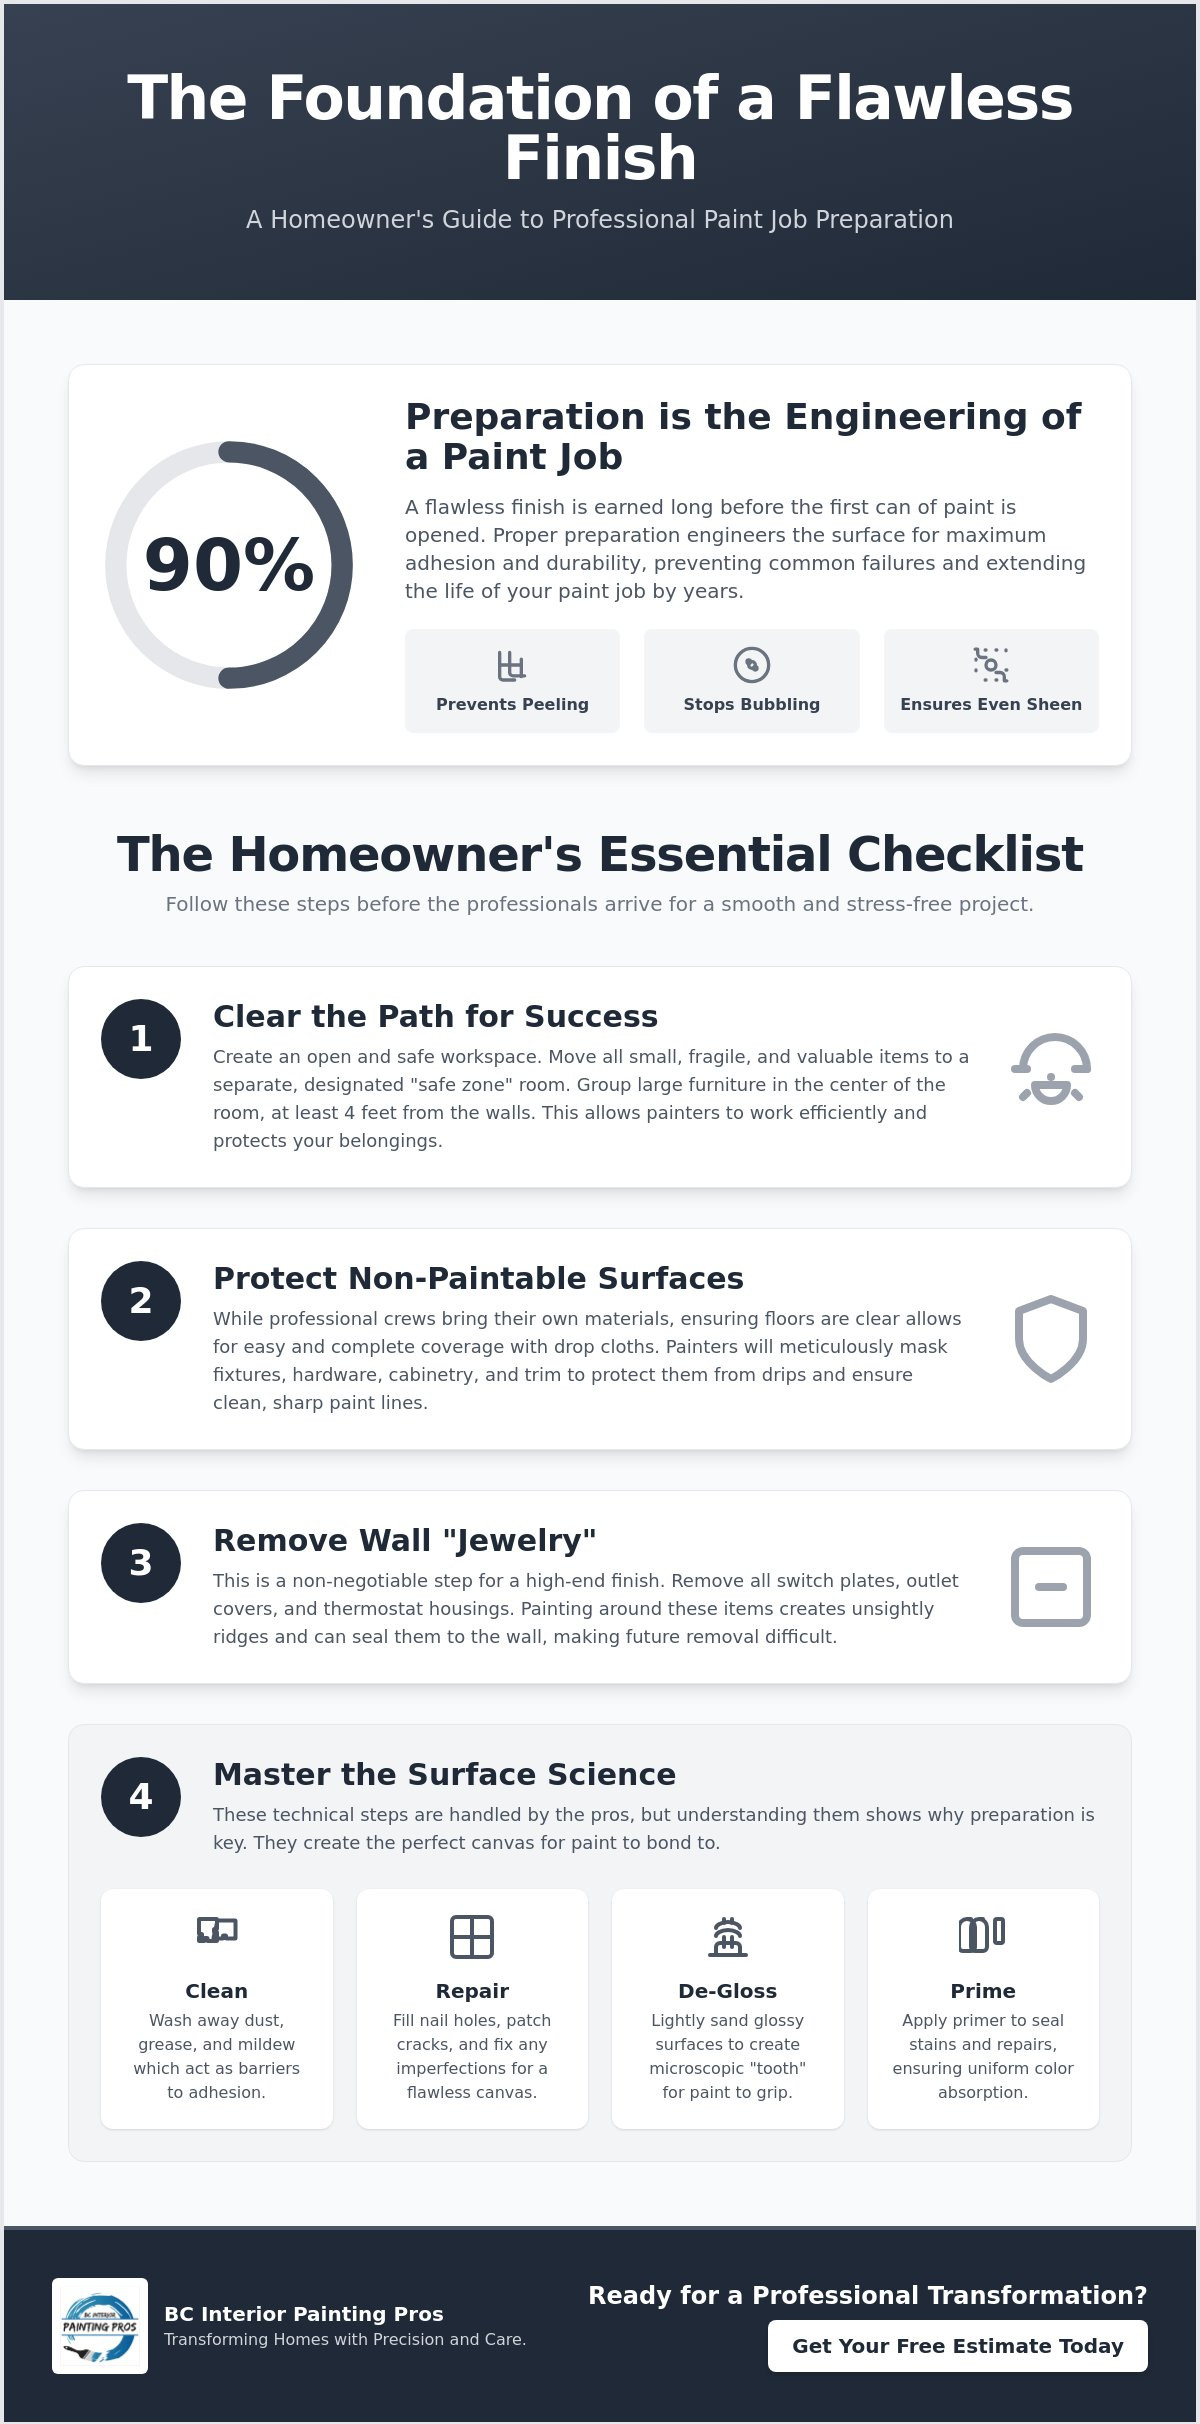
We believe that a flawless finish is earned long before the first can of paint is opened. For a skilled artisan, preparation is the process of engineering a surface to ensure maximum chemical adhesion and long-term durability. This phase represents the most critical component of any paint job preparation checklist for homeowners. Without it, even the most expensive high-end materials will eventually fail. Our team views this stage as the intersection of accuracy and attentiveness, where we revitalize your environment by creating a perfect canvas.
Skipping these essential steps often results in peeling, bubbling, or an uneven sheen that ruins the visual impact of your space. While many see prep as a simple cleaning task, it actually involves a deep understanding of surface profile. We distinguish between simple cosmetic prep, such as filling a tiny nail hole, and structural surface restoration, which involves stabilizing the drywall or wood substrate itself. By investing time in these foundational steps, you can increase the lifespan of your interior painting by years. It ensures your home remains a source of pride rather than a project in constant need of repair.
Adhesion Science: Why Paint Sticks (or Fails)
Modern latex and alkyd paints rely on two distinct types of bonds: mechanical and chemical. A mechanical bond occurs when the paint physically hooks into the microscopic texture of a surface. Professionals call this texture the tooth. Chemical bonds happen at a molecular level, where the coating fuses with the surface. Contaminants like kitchen grease, bathroom mildew, or simple household dust act as a barrier that prevents these bonds from forming. You can explore the technical details of how specific coatings facilitate these connections in The Science of Primers. Without a clean, profiled surface, the paint essentially floats on top of the dirt. This leads to premature failure and a finish that lacks the depth and clarity you deserve.
The ROI of Proper Preparation
Thorough preparation offers a significant return on investment that goes beyond mere aesthetics. A properly prepared surface is less porous and more uniform. This means you actually need less paint to achieve full, vibrant coverage. It also prevents the high costs of future maintenance by addressing underlying issues like moisture damage or loose drywall before they are covered up. This commitment to thoroughness is what separates a quick fix from a professional transformation. For more perspective on how we maintain these high standards, you can read about Expert Painters in Kamloops: Transforming Homes with Precision and Care. Doing the work correctly today saves you from the frustration and expense of repainting tomorrow. It is a professional service that prioritizes clarity and long-term results.
Room-by-Room Logistics: Clearing the Path for Success
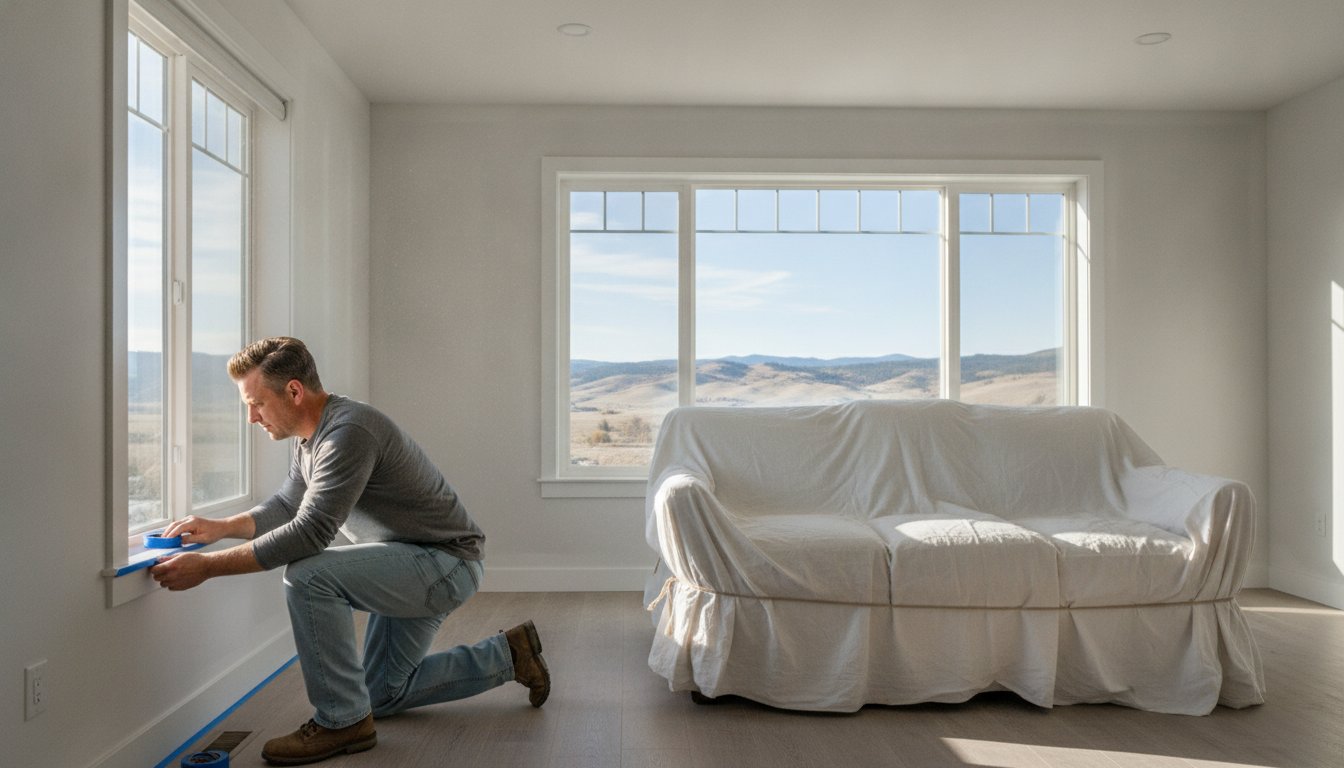
A successful transformation relies on an organized environment. Before our team arrives, creating a standardized staging area is the first step in your paint job preparation checklist for homeowners. We suggest designating a specific "safe zone" in a separate room or a low-traffic area for smaller items. This minimizes the risk of accidental damage and allows our artisans to focus entirely on the precision of their work. Protecting non-paintable surfaces is just as vital as the painting itself. We meticulously mask lighting fixtures, built-in hardware, and cabinetry to ensure that our high-tier materials only enhance the surfaces intended for change.
Removing what we call the "jewelry" of your home is a non-negotiable step for a professional finish. This includes taking off all switch plates, outlet covers, and thermostat housings. Painting around these items often results in unsightly ridges or paint-bonded covers that are difficult to remove later. We also prioritize window and door preparation. By protecting gaskets and seals with specialized tape, we ensure your home's weatherproofing remains intact while achieving clean, sharp lines. If you feel overwhelmed by these logistics, our residential painting specialists can guide you through the process during our initial walkthrough.
Handling Heavy Furniture and Fragiles
Large furniture items don't always need to leave the room. We recommend the "Center of the Room" rule. Consolidate heavy pieces in the middle of the space and cover them with clean plastic sheeting. This provides a clear three-foot perimeter for our painters to move freely. You should also remove all window treatments, including curtains, blinds, and their respective mounting brackets. For sensitive home tech, unplug all electronics and move them to your designated safe zone. Dust from sanding can be intrusive, so covering remaining tech with static-free plastic is a wise precaution.
Floor Protection Strategies
We treat your flooring with the same respect as your walls. The choice of material depends on the surface type. We typically use heavy-duty Rosin paper for hardwood or tile because it provides a flat, slip-resistant surface that won't trap moisture. For carpeted areas, thick canvas drop cloths are superior as they absorb spills and provide a cushioned barrier. Securing this protection is essential; use high-quality painter's tape to anchor the edges, preventing the material from shifting as the crew moves. We also establish high-traffic paths through entryways and hallways to protect your home's assets from the moment we step through the door.
Surface Science: Cleaning, Repairing, and Priming
Once the room is secured, we shift our focus to the substrate itself. Surface science is the core of our technical expertise. We treat every wall as a unique engineering challenge rather than a simple flat surface. This stage of the paint job preparation checklist for homeowners involves a rigorous three-step process: deep cleaning, structural repair, and strategic priming. By addressing these elements with accuracy and attentiveness, we ensure your home transformation is both beautiful and resilient. We don't just cover surfaces; we revitalize them by ensuring the foundation is flawless.
A professional finish requires a "Level 5" smooth surface, which goes far beyond filling simple nail holes. We identify structural cracks that suggest settling and address them with reinforced tape and high-tier joint compounds. Our artisans also apply high-quality caulk to every gap and joint between trim and walls. This prevents moisture intrusion and ensures there are no dark shadows or gaps in your finished project. This level of thoroughness is what defines a job well done and provides the peace of mind you deserve.
Deep Cleaning for Maximum Adhesion
Kitchens and bathrooms present specific challenges that standard household cleaners cannot solve. We use Trisodium Phosphate (TSP) to strip away stubborn kitchen grease and de-gloss existing oil-based finishes. While our focus is local, we often look to industry leaders like River City Construction Inc and their work in kitchen remodeling Boston MA as a benchmark for how deep cleaning and prep are vital for any high-end renovation. In high-humidity areas, we treat mildew at the root before the first coat of primer is applied. Skipping this step means you're simply painting over a biological hazard that will eventually resurface. After cleaning, we use microfiber tack cloths to remove microscopic particles. This ensures a dust-free surface where the new coating can bond perfectly with the wall.
Repairing Drywall and Stucco
Specialized surfaces like stucco require a different approach than standard drywall. We identify loose material and hairline fractures that could lead to moisture damage if left unaddressed. Our team uses specialized techniques to match existing textures seamlessly, ensuring repairs are invisible once painted. For drywall, our sanding process follows a strict transition from 120-grit to 220-grit paper. This creates a surface so smooth that the final sheen remains perfectly consistent across the entire room, even under harsh lighting.
Choosing the Right Primer
Priming is rarely a luxury; it's usually a necessity for a professional-grade result. We use PVA primers for new drywall to seal the porous paper and mud. For walls with water stains or smoke damage, oil-based primers are essential to block bleed-through. The right primer also provides the neutral foundation required for high-vibrancy pigments. If you're exploring 2026 Paint Colour Ideas for Kamloops Homes, remember that the depth and accuracy of those local styles depend entirely on the quality of the primer beneath them. We prioritize this transparent approach to ensure your vision is brought to life with total clarity.
The Homeowner Checklist for Professional Painters
While previous steps focused on the physical environment, this part of the paint job preparation checklist for homeowners addresses the human element of a successful project. Clear communication and logistical planning ensure the transformation moves from start to finish without unnecessary delays. We view our work as a collaborative professional service. By preparing for the arrival of our artisans, you help us maintain the steady and inviting rhythm that defines our commitment to quality. A well-prepared homeowner is the best partner for a skilled team of experts.
Before the project begins, identify a single "point person" in your household to handle daily updates. This streamlines communication and ensures that any questions regarding color placement or schedule changes are addressed immediately. We also recommend adopting a "final walkthrough" mindset the evening before the crew arrives. Briefly verify that the room logistics we discussed earlier, such as centering furniture and removing wall hardware, are complete. This proactive approach allows our team to begin their specialized focus on your walls the moment they step through the door.
Logistics and Access
Ensuring easy access to your property is essential for maintaining a professional schedule. We ask that you clear the driveway to provide ample space for van parking and the unloading of heavy equipment. If your home has a gated entryway or a security system, please ensure codes are shared or gates are unlocked before the scheduled start time. Access to a reliable water source and a designated washroom for the team are standard professional requirements that keep the project moving efficiently. Finally, have your contract or quote handy. A quick five-minute review of the scope of work on the first morning ensures everyone is aligned and confident in the plan.
Family and Pet Safety
We prioritize the safety of your household as much as the precision of our finish. Managing pets is a non-negotiable part of our safety protocol. Even the most well-behaved dogs can accidentally knock over a ladder or track wet paint across your protected flooring. We recommend keeping pets in a separate, secure area of the home or off-site entirely. Similarly, child-proofing the work zone is vital. Ladders, scaffolding, and professional-grade solvents are not toys. Designate the painting areas as strict no-go zones for children to prevent accidents. While we use high-tier, low-VOC materials, planning for proper ventilation and temporary room usage will keep your family comfortable throughout the project. If you're ready to partner with a team of local painting specialists who value your home's safety and assets, we invite you to discover our transparent approach.
Environmental Controls and Final Project Walkthrough
Engineering the perfect interior environment is the final, sophisticated step of your paint job preparation checklist for homeowners. While previous phases focused on surface profile and room logistics, this stage manages the invisible factors that dictate the quality of the cure. We prioritize accuracy and attentiveness by monitoring the atmospheric conditions within your home. A space that's too hot, too cold, or too dry will compromise the chemical integrity of high-end coatings. By controlling these variables, we ensure the transformation of your environment is as durable as it is beautiful.
Lighting plays a decisive role in the final validation of our work. We encourage homeowners to inspect their walls under both natural daylight and your home's specific artificial lighting. Shadows and highlights change throughout the day, and a professional finish must remain consistent under every condition. This thorough approach builds the trust and peace of mind that characterizes our artisan persona. We don't just finish a task; we provide a revitalized space that meets the highest tier of quality standards. It is a professional service that views your home as a sanctuary, not just a worksite.
Temperature and Humidity Management
Managing the specific Kamloops climate is vital for a flawless application. We recommend maintaining an ideal indoor temperature range between 15°C and 25°C. Kamloops’ famously dry summer air presents a unique challenge: paint can dry too quickly, leading to "lapping" issues where wet edges don't blend seamlessly. To prevent this, we use your HVAC system or strategically placed fans to maintain steady airflow without blowing dust onto wet surfaces. This level of environmental control ensures that our professional execution matches the superior supplies we utilize, preventing mid-project delays and ensuring a durable finish.
The Final Inspection Checklist
Once the brushes are down, we conduct a meticulous final walkthrough. We look for "holidays", which are small missed spots, and any potential drips in bright, direct light. This is the time to ensure all "jewelry" like switch plates and hardware are reinstalled with precision. We also verify that all masking tape is removed at the correct angle to maintain sharp, clean lines. For more guidance on what to look for during this phase, you can refer to our Residential Painting Near Me in Kamloops guide. It's our way of providing the transparent communication you deserve.
Post-Painting Care and Curing
It's vital to distinguish between paint that's "dry to the touch" and paint that's "fully cured." While your walls may feel dry within hours, modern coatings typically require up to 30 days to reach their maximum hardness and chemical resistance. During this curing period, avoid scrubbing or using harsh cleaners. If you need to clean your new walls later, use a soft cloth and mild soap to protect the finish. This ensures the longevity of your investment and maintains the vibrant sheen consistency. Ready for a professional touch that revitalizes your home? Get a Free Estimate from BC Interior Painting Pros and experience the value of a job well done.
Transform Your Living Space With Confidence
A flawless finish is never an accident. It's the result of technical expertise and a deep commitment to quality. By following this paint job preparation checklist for homeowners, you've taken the first step toward a durable, professional-grade transformation. You now understand that surface engineering and environmental controls are the true foundations of a job well done. These steps don't just protect your home's assets; they ensure that your vision is brought to life with total clarity and precision.
We've spent over 20 years serving the Kamloops community as a locally owned and fully insured business. Our team provides more than just a manual labor task; we offer a professional service that includes expert stucco repair and wallpaper installation. We prioritize long-term results over quick fixes, ensuring every project revitalizes your environment. If you're ready to experience the intersection of accuracy and attentiveness, we invite you to reach out. Book Your Professional Painting Consultation in Kamloops Today and let our skilled artisans handle the details. Your home deserves a finish that stands the test of time.
Frequently Asked Questions
Do I need to wash my walls before the painters arrive?
Yes, removing surface dust and cobwebs is a helpful step that ensures the best possible adhesion. While our team handles technical de-glossing and specialized chemical cleaning with TSP in kitchens or bathrooms, a quick wipe-down by the homeowner speeds up the project. This simple task is a vital part of your paint job preparation checklist for homeowners to ensure a pristine, dust-free environment for the first coat.
What is the best way to move heavy furniture for a painting project?
The most efficient method is the "center of the room" strategy. Move all large items at least three feet away from the walls and group them in the middle of the space. We recommend using furniture sliders to prevent floor scratches and covering the consolidated group with clean plastic sheeting. This provides our crew with a clear perimeter to work with the precision and attentiveness your home deserves.
How do I know if I need a primer or just two coats of paint?
You need a primer if you're painting over a dark color with a lighter one, covering new drywall, or addressing existing stains. While two coats of high-tier paint provide the final finish, the primer creates the necessary chemical bond and uniform porosity. We prioritize this transparent approach because using the right primer prevents peeling and ensures the final color vibrancy matches your original vision perfectly.
Should I remove my own wallpaper or let the professionals handle it?
We suggest letting professionals handle wallpaper installation and removal to protect the underlying drywall substrate. Improper DIY removal often gouges the surface, leading to expensive repairs before painting can even begin. Our artisans use specialized steamers and solutions to strip old paper efficiently, revitalizing your environment without damaging the structural integrity of your walls or creating unnecessary mid-project delays.
How long does it take for paint to dry in the Kamloops climate?
Interior paint typically feels dry to the touch within two to four hours in the dry Kamloops climate. However, you should wait at least four hours between coats to ensure proper film formation and sheen consistency. Remember that a full cure takes approximately 30 days. Maintaining steady indoor temperatures between 15°C and 25°C is essential to prevent the paint from drying too quickly and causing lapping issues.
Is it safe to stay in the house while the interior is being painted?
It's generally safe to stay in your home during an interior project because we utilize high-tier, low-VOC materials. These modern coatings emit minimal odors and dry much faster than traditional oil-based paints. We recommend planning for proper ventilation and avoiding the specific rooms being painted until the coating is dry to the touch. For residents who require extra assistance or specialized home care services for seniors, these safety measures help ensure that daily care and nutrition can continue without interruption in other parts of the house. This ensures your peace of mind while we work to revitalize your space.
What should I do with my pets during a painting job?
Pets should be kept in a separate, secure room or moved off-site during the painting process. even the most well-behaved animals can accidentally knock over equipment or track wet paint across your protected flooring. Keeping them away from the work zone protects both your pets and your home's assets. This is a critical safety item on any comprehensive paint job preparation checklist for homeowners to ensure a stress-free experience.
How do I protect my hardwood floors from paint spills?
We protect hardwood floors by using heavy-duty Rosin paper secured with high-quality painter's tape. Unlike plastic sheeting, Rosin paper provides a slip-resistant surface that doesn't trap moisture against the wood finish. We overlap the edges and tape them securely to create a continuous barrier. This ensures complete protection against spills and high-traffic wear, maintaining the tangible value of your home throughout the entire transformation process.


